Launch Pad® Owner Center

Own the Interface. Learn the Setup.

Set up The Launch Pad® correctly, find a repeatable position, solve common issues and learn where it fits into training. Use this page whenever you move it to a new bench or share it with another athlete.

✓Bookmark this page. Correct strap routing, secure tension and a repeatable lumbar position make every later adjustment easier.
The Launch Pad on a compatible weight bench
Own the interface. Learn the setup.Setup, first-session guidance, troubleshooting and direct support in one place.
Before the first loaded set

Four checks before you press.

Complete these four checks in order before adding load. Your progress stays on this device.

Under-60-second setup

Position. Route. Tension. Tug test.

Learn it accurately first. Once the routing and tension are familiar, setup takes less than a minute.

The Launch Pad Gen II centered on a compatible adjustable bench01

Position

Center The Launch Pad® on the bench. For barbell pressing, let the top extend about 1 to 1.5 inches beyond the bench. For dumbbell or machine work, start flush.

Routing The Launch Pad Gen II straps around a fixed bench frame member02

Route

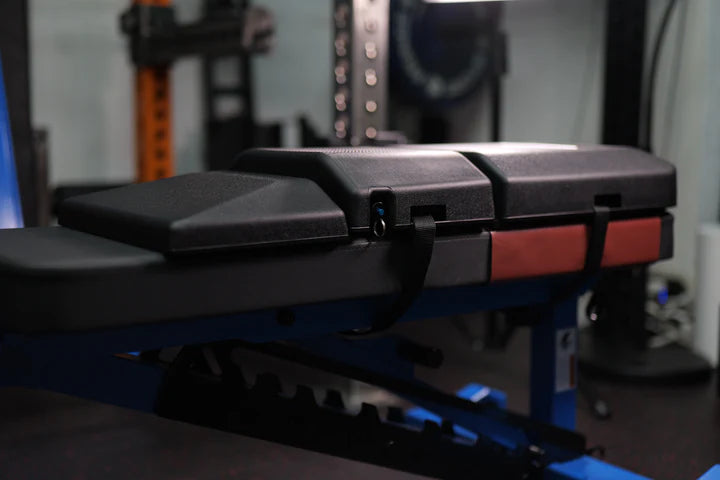
Run each strap through its molded slot and around a fixed bench-frame member. Keep the straps away from adjustment arms, cables, wheels and moving parts.

Opening the cam buckle before tightening The Launch Pad Gen II strap03

Tension

Open each cam buckle, pull the loose end until the strap lies flat and snug, then close the cam. Repeat on both sides.

Checking The Launch Pad Gen II for movement after securing both straps04

Tug test

Grip the product and pull firmly twice. It should stay fixed to the bench before you add load. If it moves, reroute and retension both straps.

Start with the hips immediately in front of the lumbar support.
The most important positioning cue

Sit in front of the lumbar support, not on it.

Start with your hips immediately in front of the lumbar piece. As you lie back, the support should meet the natural curve of your lower back. If it feels too high or too low, reset your hip position first, then change one pin setting at a time.

Hips at the edge. Lumbar behind you. Head near the logo.
  • ✓Use the adjustment pin to select the support height that meets your lower-back curve without lifting the hips.
  • ✓Re-check the cue after another athlete changes the lumbar position.
  • ✓When the support feels misplaced, reset the starting hip position before changing height again.
First-session expectations

Expect a new feel. Learn it under control.

The surface changes your contact points and available movement. Use the first few sessions to find a repeatable setup before judging it.

01

Start lighter than usual

Choose a load that lets you learn the interface without rushing the setup or forcing unfamiliar depth.

02

Slow the first reps

Lower under control and notice where your torso, lumbar support, head and upper arms meet the product.

03

Own the available range

Use only the depth you can control. More available range does not mean you must use all of it immediately.

04

Repeat your setup

Use the same hip position, lumbar setting and strap tension so you can evaluate the training response across multiple sessions.

Need guidance for using it in your program?

Training Resources offers basic programming guidance, exercise applications and practical examples. It is guidance for using the product, not individualized coaching.

Explore Training Resources
Troubleshooting

Find the issue. Follow the fix.

Choose the closest problem and work through the steps. If it remains unresolved, send support the bench and setup details listed below.

Setup and movement

Pause loaded use and reset both straps.

Movement means the routing or tension needs to be corrected before the next set.

  1. Remove the load and inspect both straps, cams and torso slots.
  2. Route around fixed frame members, not moving hardware.
  3. Pull out all slack, lock each cam and complete two firm tug tests.
  4. Contact support with clear bench photos if movement remains.
How it fits your training

Use both surfaces for different reasons.

Keep Standard Flat Bench work when specificity matters. Use The Launch Pad® when you want a different athlete-equipment interface and more room to explore controlled movement.

Standard Flat Bench

Specificity

Use the familiar planar surface for competition-specific practice, standardized testing and periods where exact flat-bench exposure is the priority.

Performance Interface™

Designed contact geometry

Use The Launch Pad® when the training intention emphasizes shoulder and upper-arm clearance, usable range, torso positioning, contact stability and a different pressing environment.

Want the evidence? Three published studies evaluated The Launch Pad®. Results are group averages, not individual guarantees. See the study protocols, findings and limitations in the Research Center →

Returns follow the current Refund Policy. Submitting this form starts a review. AMM uses the information only to evaluate and respond to your request. See the Privacy Policy.

Questions before the next set

Quick answers for owners.

Straight answers to common setup, use and support questions.

Does this replace Standard Flat Bench practice?
No. Keep Standard Flat Bench work when competition specificity, standardized testing or exact flat-bench practice matters. The Launch Pad® adds another training surface for a different intention.
Should I use my normal working weight immediately?
Start conservatively. Learn the setup, contact points, lumbar position and controllable range before returning to normal working loads.
Where can I find guidance for using it in training?
Visit Training Resources for basic programming guidance, exercise applications and practical examples. These resources provide general guidance, not individualized coaching.
Where can I read the research?
The Research Center explains the study protocols, findings and limitations in plain language.
How do I request a return?
Review the current Refund Policy, then submit your order number through the support form and wait for return instructions before shipping.
Keep this page handy

Make the setup repeatable.

Return whenever you move The Launch Pad® to another bench, change the lumbar position, share it with another athlete or need a quick setup check.