Bench systems
Compatible flat, adjustable and competition benches. Recheck torso height, rack position and bar or dumbbell clearance.


AMM · The Launch Pad® training center
Discover how The Launch Pad fits into pushing, pulling, accessory, lower-body and floor work. Find a movement, understand the setup, then decide how it belongs in your program.
01 · Start with the setting
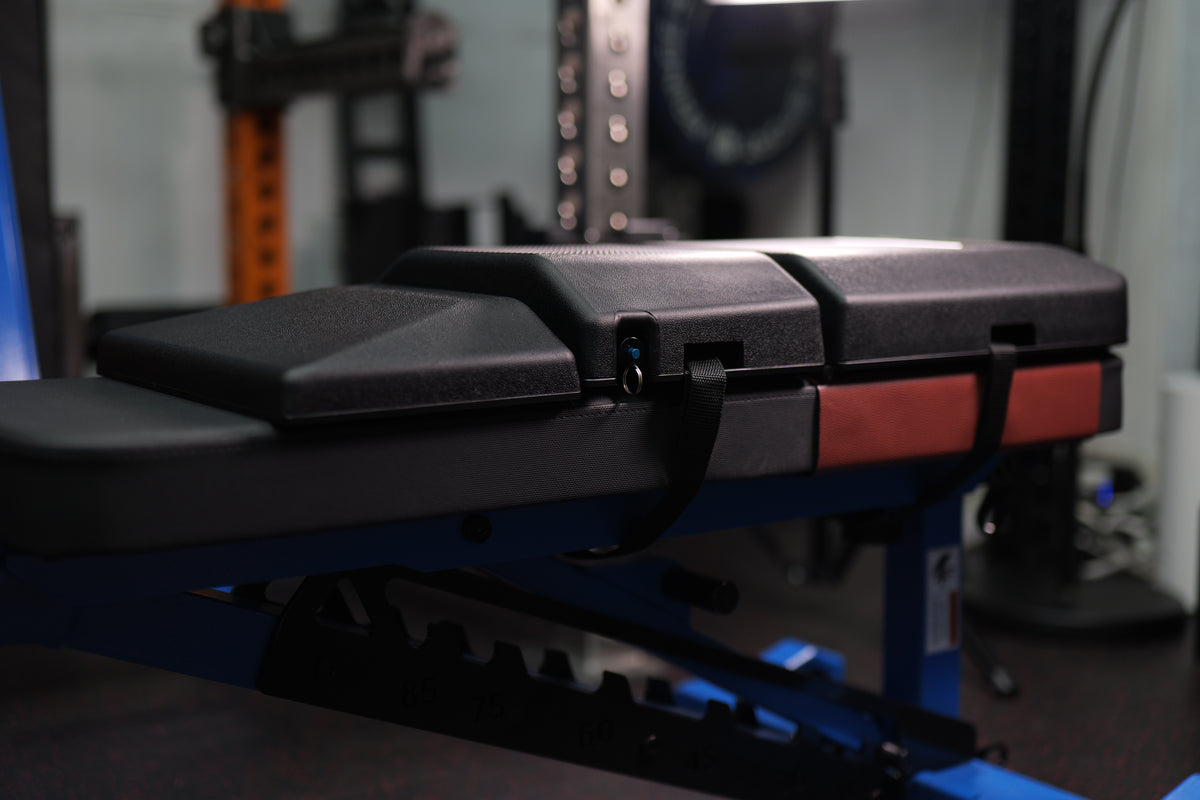
The Launch Pad is a portable training interface: a surface placed between the athlete and an appropriate support, or used directly on the floor. Its purpose in a setup depends on what it supports, where it adds height and how that changes the movement.
Compatible flat, adjustable and competition benches. Recheck torso height, rack position and bar or dumbbell clearance.
Compatible selectorized, plate-loaded and cable setups. Evaluate the actual seat, pad, pivot and restraint relationship.
The floor can be the foundation. Explore pressing and controlled core applications without a bench underneath.
Where foot support is stable, elevation can alter a hinge’s starting position or create clearance for a cable kickback.
02 · Understand the change
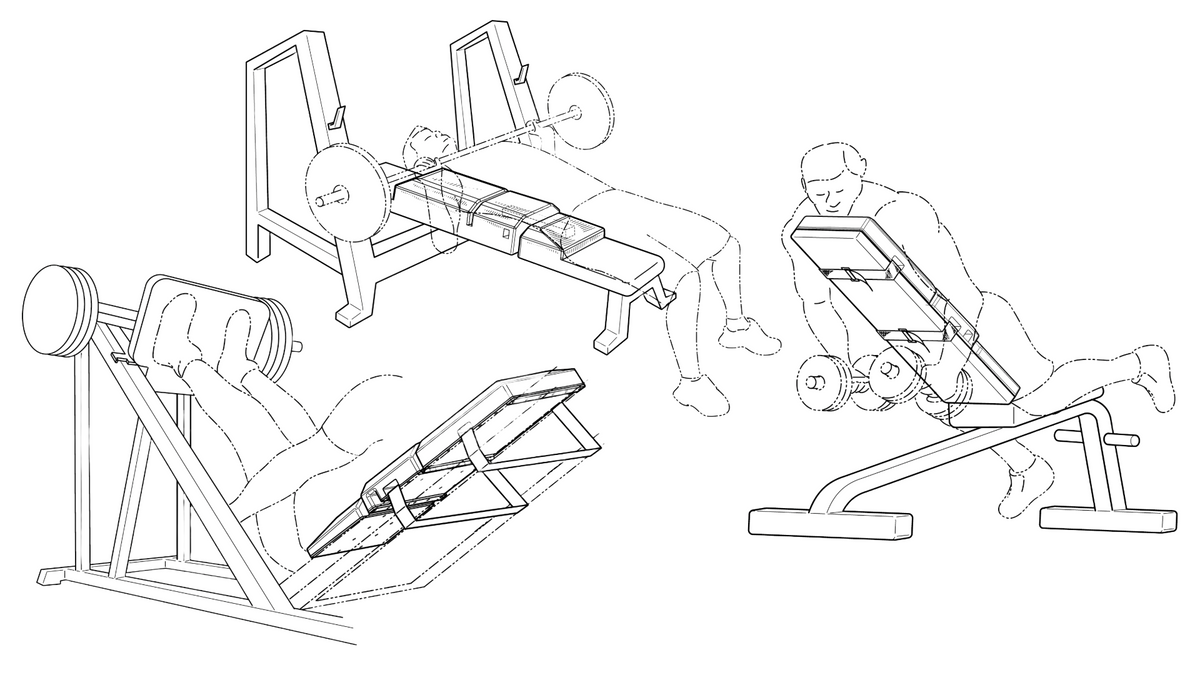
Choose an application because that physical change serves a training objective. Record what changed and judge the repetition itself; a different surface does not make every exercise automatically better.
03 · Application library
Browse 55 AMM exercise demonstrations and eight written application guides. Filter by muscle, equipment, movement or the role of the pad. Expand a card for setup, coaching cues and configuration checks.
63 applications
 ▶ Watch demonstration
Use a contoured torso contact surface within a familiar pressing pattern.
Set the positionCenter the pad on a compatible support and secure it before positioning the head, torso and feet. Recheck rack height or handle reach after adding the pad.
Coach the repetitionKeep the chosen grip, touch point and range repeatable. Start with a load that lets you evaluate the changed setup.
Check the configurationThe raised contact surface changes the athlete’s relationship to the bar or handles. Confirm clearance and a controlled exit before loading.
 ▶ Watch demonstration
Use chest support or a different seat height to organize a pulling movement.
Set the positionPosition the pad for the demonstrated chest or seated contact. Confirm that the bench, feet and pulling station stay stable.
Coach the repetitionChoose a repeatable elbow path and avoid bouncing the torso off the support to finish a repetition.
Check the configurationCheck that the handles and weights clear the pad and bench through the full intended path.
 ▶ Watch demonstration
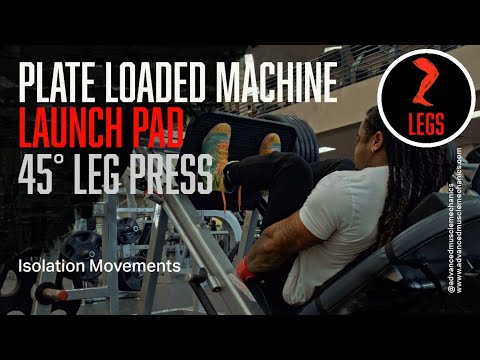
Explore a different body-support position within a compatible leg machine.
Set the positionCheck the seat, backrest, pivots, restraints and foot or roller contact after inserting the pad. Use the machine’s instructions as the starting point.
Coach the repetitionRepeat the same seat settings and control the chosen range without losing support.
Check the configurationDo not use the pad if it prevents a restraint engaging, misaligns the joint with the pivot, or interferes with the machine.
 Content coming soon
Explore a pressing setup with The Launch Pad supported directly by the floor.
Set the positionLay the pad on a level, non-slip floor and establish head, torso and foot contact. Use manageable dumbbells and a controlled way to get into position.
Coach the repetitionCompare the actual lower position with a conventional floor press. A raised torso can change when the upper arms meet the floor.
Check the configurationDo not assume the usual floor-press range limit remains unchanged. Establish the intended stopping point before increasing load.
 ▶ Watch demonstration
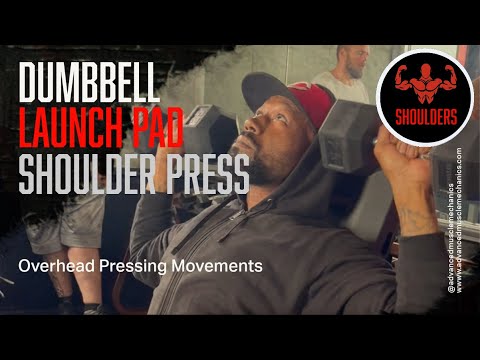
Use a contoured torso contact surface within a familiar pressing pattern.
Set the positionCenter the pad on a compatible support and secure it before positioning the head, torso and feet. Recheck rack height or handle reach after adding the pad.
Coach the repetitionKeep the chosen grip, touch point and range repeatable. Start with a load that lets you evaluate the changed setup.
Check the configurationThe raised contact surface changes the athlete’s relationship to the bar or handles. Confirm clearance and a controlled exit before loading.
 ▶ Watch demonstration
Set a repeatable torso and upper-arm relationship for elbow-flexion work.
Set the positionSecure the pad and establish the demonstrated seated, inclined or supine position. Confirm room for the implement beside the bench.
Coach the repetitionKeep the upper-arm position deliberate and control the transition between lowering and lifting.
Check the configurationA different torso angle can change the starting position. Select a range that fits the athlete and exercise.
 ▶ Watch demonstration
Explore upper-back support for hip-extension work.
Set the positionUse only a stable, fully supported placement that will not slide as force changes direction. Establish the upper-back contact and foot position before adding resistance.
Coach the repetitionKeep the intended hip motion controlled and repeatable; avoid shifting the contact point during the set.
Check the configurationCheck the bench or floor contact and a manageable way to enter and exit the setup.
Content coming soonCreate clearance between the working foot and the floor during a cable kickback.
Set the positionUse a secure placement that fully supports the standing foot and allows a stable handhold. Keep the pad clear of the cable path and attachment.
Coach the repetitionMove the working leg through the intended arc without using extra trunk motion to create range. Test the floor clearance before loading.
Check the configurationElevation is useful only if stance and balance remain controlled. Choose a purpose-built platform if the pad cannot provide a stable standing contact.
Content coming soonCreate additional travel from the athlete’s standing position to a bar resting on the floor.
Set the positionUse only if both feet can be fully and stably supported on a secure pad placement. Confirm the support does not rock, deform unpredictably or slip, then rehearse with a light load.
Coach the repetitionKeep the bar path close and choose a start position you can control. Reduce the deficit or use a purpose-built platform when the contour does not suit the stance.
Check the configurationApproximately three inches describes nominal elevation, not a uniform usable height across a contoured pad. Do not stack pads or use an unstable foot contact.
Content coming soonUse a supported floor position to explore controlled trunk work.
Set the positionPlace the pad fully on the floor. Find comfortable head and torso contact and choose a small, controllable movement.
Coach the repetitionKeep the starting position and movement range repeatable. Breathing and control take priority over extra range.
Check the configurationDo not treat the contour as a prescription for spinal extension. Adjust or choose another setup if contact is uncomfortable.
 ▶ Watch demonstration
Explore chest isolation with a different torso support and starting position.
Set the positionSecure the pad and align the torso with the bench or machine. Check the cable or handle path through an unloaded repetition.
Coach the repetitionUse a controllable elbow bend and a deliberate range. Keep the support position consistent across repetitions.
Check the configurationChanging torso position can change the start angle and available range; do not use the pad to force extra depth.
 ▶ Watch demonstration
Use a contoured torso contact surface within a familiar pressing pattern.
Set the positionCenter the pad on a compatible support and secure it before positioning the head, torso and feet. Recheck rack height or handle reach after adding the pad.
Coach the repetitionKeep the chosen grip, touch point and range repeatable. Start with a load that lets you evaluate the changed setup.
Check the configurationThe raised contact surface changes the athlete’s relationship to the bar or handles. Confirm clearance and a controlled exit before loading.
 ▶ Watch demonstration
Explore chest isolation with a different torso support and starting position.
Set the positionSecure the pad and align the torso with the bench or machine. Check the cable or handle path through an unloaded repetition.
Coach the repetitionUse a controllable elbow bend and a deliberate range. Keep the support position consistent across repetitions.
Check the configurationChanging torso position can change the start angle and available range; do not use the pad to force extra depth.
 ▶ Watch demonstration
Explore chest isolation with a different torso support and starting position.
Set the positionSecure the pad and align the torso with the bench or machine. Check the cable or handle path through an unloaded repetition.
Coach the repetitionUse a controllable elbow bend and a deliberate range. Keep the support position consistent across repetitions.
Check the configurationChanging torso position can change the start angle and available range; do not use the pad to force extra depth. Report the band or assistance setup separately from the bar or dumbbell load.
 ▶ Watch demonstration
Use a contoured torso contact surface within a familiar pressing pattern.
Set the positionCenter the pad on a compatible support and secure it before positioning the head, torso and feet. Recheck rack height or handle reach after adding the pad.
Coach the repetitionKeep the chosen grip, touch point and range repeatable. Start with a load that lets you evaluate the changed setup.
Check the configurationThe raised contact surface changes the athlete’s relationship to the bar or handles. Confirm clearance and a controlled exit before loading.
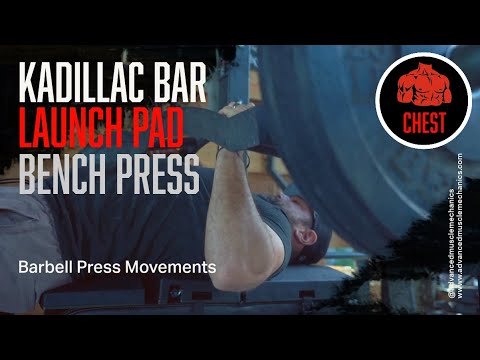 ▶ Watch demonstration
Use a contoured torso contact surface within a familiar pressing pattern.
Set the positionCenter the pad on a compatible support and secure it before positioning the head, torso and feet. Recheck rack height or handle reach after adding the pad.
Coach the repetitionKeep the chosen grip, touch point and range repeatable. Start with a load that lets you evaluate the changed setup.
Check the configurationThe raised contact surface changes the athlete’s relationship to the bar or handles. Confirm clearance and a controlled exit before loading.
 ▶ Watch demonstration
Use a contoured torso contact surface within a familiar pressing pattern.
Set the positionCenter the pad on a compatible support and secure it before positioning the head, torso and feet. Recheck rack height or handle reach after adding the pad.
Coach the repetitionKeep the chosen grip, touch point and range repeatable. Start with a load that lets you evaluate the changed setup.
Check the configurationThe raised contact surface changes the athlete’s relationship to the bar or handles. Confirm clearance and a controlled exit before loading. Report the band or assistance setup separately from the bar or dumbbell load.
 ▶ Watch demonstration
Use a contoured torso contact surface within a familiar pressing pattern.
Set the positionCenter the pad on a compatible support and secure it before positioning the head, torso and feet. Recheck rack height or handle reach after adding the pad.
Coach the repetitionKeep the chosen grip, touch point and range repeatable. Start with a load that lets you evaluate the changed setup.
Check the configurationThe raised contact surface changes the athlete’s relationship to the bar or handles. Confirm clearance and a controlled exit before loading.
 ▶ Watch demonstration
Use a contoured torso contact surface within a familiar pressing pattern.
Set the positionCenter the pad on a compatible support and secure it before positioning the head, torso and feet. Recheck rack height or handle reach after adding the pad.
Coach the repetitionKeep the chosen grip, touch point and range repeatable. Start with a load that lets you evaluate the changed setup.
Check the configurationThe raised contact surface changes the athlete’s relationship to the bar or handles. Confirm clearance and a controlled exit before loading.
 ▶ Watch demonstration
Use a contoured torso contact surface within a familiar pressing pattern.
Set the positionCenter the pad on a compatible support and secure it before positioning the head, torso and feet. Recheck rack height or handle reach after adding the pad.
Coach the repetitionKeep the chosen grip, touch point and range repeatable. Start with a load that lets you evaluate the changed setup.
Check the configurationThe raised contact surface changes the athlete’s relationship to the bar or handles. Confirm clearance and a controlled exit before loading.
 ▶ Watch demonstration
Use a contoured torso contact surface within a familiar pressing pattern.
Set the positionCenter the pad on a compatible support and secure it before positioning the head, torso and feet. Recheck rack height or handle reach after adding the pad.
Coach the repetitionKeep the chosen grip, touch point and range repeatable. Start with a load that lets you evaluate the changed setup.
Check the configurationOffset loading adds an asymmetrical demand. Use experienced supervision, reliable spotters and a carefully controlled setup; this is an advanced variation.
 ▶ Watch demonstration
Use a contoured torso contact surface within a familiar pressing pattern.
Set the positionCenter the pad on a compatible support and secure it before positioning the head, torso and feet. Recheck rack height or handle reach after adding the pad.
Coach the repetitionKeep the chosen grip, touch point and range repeatable. Start with a load that lets you evaluate the changed setup.
Check the configurationThe raised contact surface changes the athlete’s relationship to the bar or handles. Confirm clearance and a controlled exit before loading.
 ▶ Watch demonstration
Use a contoured torso contact surface within a familiar pressing pattern.
Set the positionCenter the pad on a compatible support and secure it before positioning the head, torso and feet. Recheck rack height or handle reach after adding the pad.
Coach the repetitionKeep the chosen grip, touch point and range repeatable. Start with a load that lets you evaluate the changed setup.
Check the configurationThe raised contact surface changes the athlete’s relationship to the bar or handles. Confirm clearance and a controlled exit before loading.
 ▶ Watch demonstration
Use a contoured torso contact surface within a familiar pressing pattern.
Set the positionCenter the pad on a compatible support and secure it before positioning the head, torso and feet. Recheck rack height or handle reach after adding the pad.
Coach the repetitionKeep the chosen grip, touch point and range repeatable. Start with a load that lets you evaluate the changed setup.
Check the configurationThe raised contact surface changes the athlete’s relationship to the bar or handles. Confirm clearance and a controlled exit before loading. Report the band or assistance setup separately from the bar or dumbbell load.
 ▶ Watch demonstration
Use a contoured torso contact surface within a familiar pressing pattern.
Set the positionCenter the pad on a compatible support and secure it before positioning the head, torso and feet. Recheck rack height or handle reach after adding the pad.
Coach the repetitionKeep the chosen grip, touch point and range repeatable. Start with a load that lets you evaluate the changed setup.
Check the configurationThe raised contact surface changes the athlete’s relationship to the bar or handles. Confirm clearance and a controlled exit before loading.
 ▶ Watch demonstration
Use a contoured torso contact surface within a familiar pressing pattern.
Set the positionCenter the pad on a compatible support and secure it before positioning the head, torso and feet. Recheck rack height or handle reach after adding the pad.
Coach the repetitionKeep the chosen grip, touch point and range repeatable. Start with a load that lets you evaluate the changed setup.
Check the configurationThe raised contact surface changes the athlete’s relationship to the bar or handles. Confirm clearance and a controlled exit before loading. Report the band or assistance setup separately from the bar or dumbbell load.
 ▶ Watch demonstration
Use a contoured torso contact surface within a familiar pressing pattern.
Set the positionCenter the pad on a compatible support and secure it before positioning the head, torso and feet. Recheck rack height or handle reach after adding the pad.
Coach the repetitionKeep the chosen grip, touch point and range repeatable. Start with a load that lets you evaluate the changed setup.
Check the configurationThe raised contact surface changes the athlete’s relationship to the bar or handles. Confirm clearance and a controlled exit before loading.
 ▶ Watch demonstration
Use a contoured torso contact surface within a familiar pressing pattern.
Set the positionCenter the pad on a compatible support and secure it before positioning the head, torso and feet. Recheck rack height or handle reach after adding the pad.
Coach the repetitionKeep the chosen grip, touch point and range repeatable. Start with a load that lets you evaluate the changed setup.
Check the configurationThe raised contact surface changes the athlete’s relationship to the bar or handles. Confirm clearance and a controlled exit before loading. Report the band or assistance setup separately from the bar or dumbbell load.
 ▶ Watch demonstration
Explore chest isolation with a different torso support and starting position.
Set the positionSecure the pad and align the torso with the bench or machine. Check the cable or handle path through an unloaded repetition.
Coach the repetitionUse a controllable elbow bend and a deliberate range. Keep the support position consistent across repetitions.
Check the configurationChanging torso position can change the start angle and available range; do not use the pad to force extra depth.
 ▶ Watch demonstration
Explore chest isolation with a different torso support and starting position.
Set the positionSecure the pad and align the torso with the bench or machine. Check the cable or handle path through an unloaded repetition.
Coach the repetitionUse a controllable elbow bend and a deliberate range. Keep the support position consistent across repetitions.
Check the configurationChanging torso position can change the start angle and available range; do not use the pad to force extra depth.
 ▶ Watch demonstration
Use a contoured torso contact surface within a familiar pressing pattern.
Set the positionCenter the pad on a compatible support and secure it before positioning the head, torso and feet. Recheck rack height or handle reach after adding the pad.
Coach the repetitionKeep the chosen grip, touch point and range repeatable. Start with a load that lets you evaluate the changed setup.
Check the configurationThe raised contact surface changes the athlete’s relationship to the bar or handles. Confirm clearance and a controlled exit before loading.
 ▶ Watch demonstration
Explore chest isolation with a different torso support and starting position.
Set the positionSecure the pad and align the torso with the bench or machine. Check the cable or handle path through an unloaded repetition.
Coach the repetitionUse a controllable elbow bend and a deliberate range. Keep the support position consistent across repetitions.
Check the configurationChanging torso position can change the start angle and available range; do not use the pad to force extra depth.
 ▶ Watch demonstration
Use chest support or a different seat height to organize a pulling movement.
Set the positionPosition the pad for the demonstrated chest or seated contact. Confirm that the bench, feet and pulling station stay stable.
Coach the repetitionChoose a repeatable elbow path and avoid bouncing the torso off the support to finish a repetition.
Check the configurationCheck that the handles and weights clear the pad and bench through the full intended path.
 ▶ Watch demonstration
Use chest support or a different seat height to organize a pulling movement.
Set the positionPosition the pad for the demonstrated chest or seated contact. Confirm that the bench, feet and pulling station stay stable.
Coach the repetitionChoose a repeatable elbow path and avoid bouncing the torso off the support to finish a repetition.
Check the configurationCheck that the handles and weights clear the pad and bench through the full intended path.
 ▶ Watch demonstration
Use chest support or a different seat height to organize a pulling movement.
Set the positionPosition the pad for the demonstrated chest or seated contact. Confirm that the bench, feet and pulling station stay stable.
Coach the repetitionChoose a repeatable elbow path and avoid bouncing the torso off the support to finish a repetition.
Check the configurationCheck that the handles and weights clear the pad and bench through the full intended path.
 ▶ Watch demonstration
Use chest support or a different seat height to organize a pulling movement.
Set the positionPosition the pad for the demonstrated chest or seated contact. Confirm that the bench, feet and pulling station stay stable.
Coach the repetitionChoose a repeatable elbow path and avoid bouncing the torso off the support to finish a repetition.
Check the configurationCheck that the handles and weights clear the pad and bench through the full intended path.
 ▶ Watch demonstration
Explore the relationship between torso support, handle reach and the line of pull.
Set the positionCheck compatibility with the seat, thigh restraint and cable path. Establish stable lower-body contact before pulling.
Coach the repetitionKeep the selected torso position and grip consistent rather than changing them as the set becomes harder.
Check the configurationAn added surface must not compromise the restraint or move the athlete outside the machine’s intended operating position.
 ▶ Watch demonstration
Explore the relationship between torso support, handle reach and the line of pull.
Set the positionCheck compatibility with the seat, thigh restraint and cable path. Establish stable lower-body contact before pulling.
Coach the repetitionKeep the selected torso position and grip consistent rather than changing them as the set becomes harder.
Check the configurationAn added surface must not compromise the restraint or move the athlete outside the machine’s intended operating position.
 ▶ Watch demonstration
Use a contoured torso contact surface within a familiar pressing pattern.
Set the positionCenter the pad on a compatible support and secure it before positioning the head, torso and feet. Recheck rack height or handle reach after adding the pad.
Coach the repetitionKeep the chosen grip, touch point and range repeatable. Start with a load that lets you evaluate the changed setup.
Check the configurationThe raised contact surface changes the athlete’s relationship to the bar or handles. Confirm clearance and a controlled exit before loading.
 ▶ Watch demonstration
Use support to make shoulder accessory work easier to organize and repeat.
Set the positionSet the bench angle and contact position, then check arm and cable clearance with little resistance.
Coach the repetitionMove through the intended arc without substituting a large torso swing. Use the same support position each set.
Check the configurationThe support is a positioning option; it does not establish one ideal shoulder angle or guarantee isolated muscle recruitment.
 ▶ Watch demonstration
Use support to make shoulder accessory work easier to organize and repeat.
Set the positionSet the bench angle and contact position, then check arm and cable clearance with little resistance.
Coach the repetitionMove through the intended arc without substituting a large torso swing. Use the same support position each set.
Check the configurationThe support is a positioning option; it does not establish one ideal shoulder angle or guarantee isolated muscle recruitment.
 ▶ Watch demonstration
Use support to make shoulder accessory work easier to organize and repeat.
Set the positionSet the bench angle and contact position, then check arm and cable clearance with little resistance.
Coach the repetitionMove through the intended arc without substituting a large torso swing. Use the same support position each set.
Check the configurationThe support is a positioning option; it does not establish one ideal shoulder angle or guarantee isolated muscle recruitment.
 ▶ Watch demonstration
Use support to make shoulder accessory work easier to organize and repeat.
Set the positionSet the bench angle and contact position, then check arm and cable clearance with little resistance.
Coach the repetitionMove through the intended arc without substituting a large torso swing. Use the same support position each set.
Check the configurationThe support is a positioning option; it does not establish one ideal shoulder angle or guarantee isolated muscle recruitment.
 ▶ Watch demonstration
Organize upper-arm position and support for triceps-focused work.
Set the positionSecure the pad, check head support and choose a cable or implement path that clears the head and equipment.
Coach the repetitionUse a repeatable elbow path and controlled lowering. Keep load modest while establishing the configuration.
Check the configurationBench angle, cable height and grip all change the task. Record them rather than treating all variations as interchangeable.
 ▶ Watch demonstration
Organize upper-arm position and support for triceps-focused work.
Set the positionSecure the pad, check head support and choose a cable or implement path that clears the head and equipment.
Coach the repetitionUse a repeatable elbow path and controlled lowering. Keep load modest while establishing the configuration.
Check the configurationBench angle, cable height and grip all change the task. Record them rather than treating all variations as interchangeable.
 ▶ Watch demonstration
Set a repeatable torso and upper-arm relationship for elbow-flexion work.
Set the positionSecure the pad and establish the demonstrated seated, inclined or supine position. Confirm room for the implement beside the bench.
Coach the repetitionKeep the upper-arm position deliberate and control the transition between lowering and lifting.
Check the configurationA different torso angle can change the starting position. Select a range that fits the athlete and exercise.
 ▶ Watch demonstration
Set a repeatable torso and upper-arm relationship for elbow-flexion work.
Set the positionSecure the pad and establish the demonstrated seated, inclined or supine position. Confirm room for the implement beside the bench.
Coach the repetitionKeep the upper-arm position deliberate and control the transition between lowering and lifting.
Check the configurationA different torso angle can change the starting position. Select a range that fits the athlete and exercise.
 ▶ Watch demonstration
Set a repeatable torso and upper-arm relationship for elbow-flexion work.
Set the positionSecure the pad and establish the demonstrated seated, inclined or supine position. Confirm room for the implement beside the bench.
Coach the repetitionKeep the upper-arm position deliberate and control the transition between lowering and lifting.
Check the configurationA different torso angle can change the starting position. Select a range that fits the athlete and exercise.
 ▶ Watch demonstration
Organize upper-arm position and support for triceps-focused work.
Set the positionSecure the pad, check head support and choose a cable or implement path that clears the head and equipment.
Coach the repetitionUse a repeatable elbow path and controlled lowering. Keep load modest while establishing the configuration.
Check the configurationBench angle, cable height and grip all change the task. Record them rather than treating all variations as interchangeable.
 ▶ Watch demonstration
Organize upper-arm position and support for triceps-focused work.
Set the positionSecure the pad, check head support and choose a cable or implement path that clears the head and equipment.
Coach the repetitionUse a repeatable elbow path and controlled lowering. Keep load modest while establishing the configuration.
Check the configurationBench angle, cable height and grip all change the task. Record them rather than treating all variations as interchangeable.
 ▶ Watch demonstration
Organize upper-arm position and support for triceps-focused work.
Set the positionSecure the pad, check head support and choose a cable or implement path that clears the head and equipment.
Coach the repetitionUse a repeatable elbow path and controlled lowering. Keep load modest while establishing the configuration.
Check the configurationBench angle, cable height and grip all change the task. Record them rather than treating all variations as interchangeable.
 ▶ Watch demonstration
Explore upper-back support for hip-extension work.
Set the positionUse only a stable, fully supported placement that will not slide as force changes direction. Establish the upper-back contact and foot position before adding resistance.
Coach the repetitionKeep the intended hip motion controlled and repeatable; avoid shifting the contact point during the set.
Check the configurationCheck the bench or floor contact and a manageable way to enter and exit the setup.
 ▶ Watch demonstration
Explore supported hip extension with room for the legs to travel.
Set the positionUse only a stable support with sufficient leg clearance and a secure upper-body contact. Rehearse the movement without added load.
Coach the repetitionControl the leg motion and keep the contact position consistent without swinging the whole setup.
Check the configurationConfirm support and entry/exit first. This demonstration does not make every bench suitable for this application.
 ▶ Watch demonstration
Explore a different body-support position within a compatible leg machine.
Set the positionCheck the seat, backrest, pivots, restraints and foot or roller contact after inserting the pad. Use the machine’s instructions as the starting point.
Coach the repetitionRepeat the same seat settings and control the chosen range without losing support.
Check the configurationDo not use the pad if it prevents a restraint engaging, misaligns the joint with the pivot, or interferes with the machine.
 ▶ Watch demonstration
Explore a different body-support position within a compatible leg machine.
Set the positionCheck the seat, backrest, pivots, restraints and foot or roller contact after inserting the pad. Use the machine’s instructions as the starting point.
Coach the repetitionRepeat the same seat settings and control the chosen range without losing support.
Check the configurationDo not use the pad if it prevents a restraint engaging, misaligns the joint with the pivot, or interferes with the machine.
 ▶ Watch demonstration
Use elevation or a changed foot position to alter the geometry of a hinge.
Set the positionConfirm a stable, non-slip placement with the intended foot contact fully supported. Rehearse the hinge without load.
Coach the repetitionMaintain controlled balance and a repeatable lower position. Choose the range from movement control, not from elevation alone.
Check the configurationThe pad is contoured. Do not assume that every point offers a level, three-inch standing surface.
 ▶ Watch demonstration
Explore the demonstrated heel-elevated stance as a separate hinge variation.
Set the positionConfirm a stable, non-slip placement with the intended foot contact fully supported. Rehearse the hinge without load.
Coach the repetitionMaintain controlled balance and a repeatable lower position. Choose the range from movement control, not from elevation alone.
Check the configurationA heel-elevated RDL is not the same task as a whole-foot deficit deadlift. Keep the support secure and judge the stance on control and balance.
 ▶ Watch demonstration
Explore the demonstrated heel-elevated stance as a separate hinge variation.
Set the positionConfirm a stable, non-slip placement with the intended foot contact fully supported. Rehearse the hinge without load.
Coach the repetitionMaintain controlled balance and a repeatable lower position. Choose the range from movement control, not from elevation alone.
Check the configurationA heel-elevated RDL is not the same task as a whole-foot deficit deadlift. Keep the support secure and judge the stance on control and balance.
 ▶ Watch demonstration
Use an appropriate support contact for a unilateral lower-body variation.
Set the positionCheck the pad and supporting surface for movement. Establish a balanced stance and a comfortable rear-foot contact before loading.
Coach the repetitionKeep front-foot pressure, stance length and intended depth repeatable.
Check the configurationThe setup must suit the athlete’s balance and available range; elevation is not a reason to force depth.
Content coming soonUse alternating limb movement to practice trunk control from a supported position.
Set the positionLie supine on a stable floor-supported pad. Choose a limb position that can be maintained without losing the intended trunk position.
Coach the repetitionMove one limb at a time or use a shorter lever before combining opposite arm and leg motion.
Check the configurationJudge the variation by control and comfort. Added elevation changes the setup; it is not evidence of greater muscle activation.
Content coming soonExplore a different back-support interface during a compatible machine-based hip thrust.
Set the positionEvaluate the machine’s back support, foot platform and belt or restraint together. Place The Launch Pad only where it can remain securely supported without affecting the machine’s moving parts or locking system.
Coach the repetitionSet a repeatable foot position and controlled hip-extension range. Keep the intended torso contact consistent as the back support or lever moves.
Check the configurationRecheck belt fit, start position and release access after adding the pad. Machine designs vary; the interface must preserve the intended restraint and movement path.
Content coming soonExplore a different seated support relationship during inner-thigh adduction work.
Set the positionOn a compatible machine, evaluate The Launch Pad against the existing seat and backrest. Preserve foot support, appropriate thigh-pad contact and access to the range-adjustment control.
Coach the repetitionBring the thighs inward through the selected range with a controlled return. Keep the pelvis and torso position consistent rather than shifting to finish a repetition.
Check the configurationThis application trains the hip adductors. Adding support must not prevent the thigh pads, seat controls or movement stops from functioning as intended.
Content coming soonExplore a different seated support relationship during outer-hip abduction work.
Set the positionCheck how the pad changes the relationship between the torso, seat, foot supports and thigh pads. Use a placement that remains stable through the machine’s intended range.
Coach the repetitionMove the thighs outward and return under control. Record the chosen torso position and range so the exercise remains repeatable across sets.
Check the configurationConfirm that the added support preserves thigh-pad contact, range controls and entry and exit. Treat torso angle as a setup choice rather than assuming every angle produces the same task.
Try a broader muscle group, equipment choice or search term.
04 · Go deeper
Follow a focused guide when you want more context than an exercise card. Each guide connects the movement options to setup choices and programming decisions.
Guide 01
Place, secure and check the interface before loading.
Open the guide →Guide 02
Barbells, dumbbells, machines and chest isolation.
Open the guide →Guide 03
Rows, pulldowns and chest-supported pulling.
Open the guide →Guide 04
Overhead work, raises and rear-delt applications.
Open the guide →Guide 05
Biceps and triceps work across several support positions.
Open the guide →Guide 06
Hip extension, machines, unilateral work and elevation.
Open the guide →Guide 07
Pressing and trunk work with the floor as the foundation.
Open the guide →Guide 08
Turn an application into a repeatable part of a program.
Open the guide →05 · Coach the application
Strength practice, accessory volume, position practice or useful clearance.
Identify the bench, machine, floor or standing-support role.
Keep the relevant load, grip, range and execution rules consistent.
Record repetition quality, performance and how the setup feels across sessions.
06 · Research in context
Two training trials examined The Launch Pad within specific bench-press programs. The charts show the reported mean strength changes, while the study pages provide the full methods and interpretation.
4-week study
Bars show reported mean changes from zero on the same 0–25 kg scale. Standard deviations are reported here, not drawn as error bars: flat bench 11.1 ± 2.4 kg; Launch Pad 18.4 ± 4.3 kg.
8-week study
Bars show reported mean changes from zero on the same 0–25 kg scale. Standard deviations are reported here, not drawn as error bars: flat bench 9.7 ± 3.4 kg; Launch Pad 19.4 ± 4.3 kg.
07 · Ask AMM
Tell AMM what you train, what equipment you have and where you want to use The Launch Pad. Include the bench or machine model and the movement you are considering.
For an existing order, include the product version and the specific setup question. Keep private health information out of this form.
Advanced Muscle Mechanics®
Explore the product, understand the setup and choose the applications that belong in your training.