Barbell & specialty bars
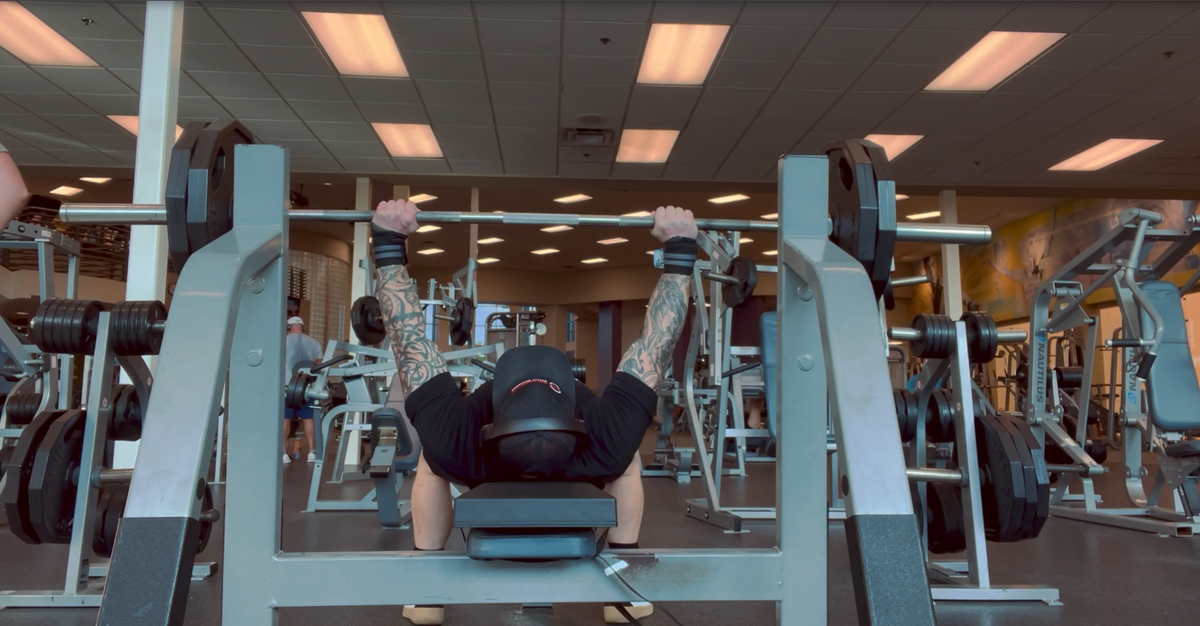
Use the pad to explore a different torso contact while keeping the grip, touch point and chosen repetition standard deliberate. Recheck rack and safety heights.


AMM · Chest Applications
Explore barbell, dumbbell, cable and machine applications for chest training. Choose the support position and movement pattern together.
01 · Application logic
Use the pad to explore a different torso contact while keeping the grip, touch point and chosen repetition standard deliberate. Recheck rack and safety heights.
Confirm room beside the bench and a manageable way to start and finish. Added torso elevation may change available depth; choose the range intentionally.
The same pad can meet a very different seat or backrest. Evaluate handle reach, the line of pull and the restraints for that exact machine.
02 · Compare the setup
The bench’s built-in pad establishes torso contact and height.
A contoured interface changes contact and raises the torso relative to the existing support. Recheck the movement rather than assuming the same setup transfers unchanged.
03 · Exercise library
Choose a demonstration or expand a card for setup and coaching considerations. Written application guides are identified separately.
24 applications
 ▶ Watch demonstration
Use a contoured torso contact surface within a familiar pressing pattern.
Set the positionCenter the pad on a compatible support and secure it before positioning the head, torso and feet. Recheck rack height or handle reach after adding the pad.
Coach the repetitionKeep the chosen grip, touch point and range repeatable. Start with a load that lets you evaluate the changed setup.
Check the configurationThe raised contact surface changes the athlete’s relationship to the bar or handles. Confirm clearance and a controlled exit before loading.
 Content coming soon
Explore a pressing setup with The Launch Pad supported directly by the floor.
Set the positionLay the pad on a level, non-slip floor and establish head, torso and foot contact. Use manageable dumbbells and a controlled way to get into position.
Coach the repetitionCompare the actual lower position with a conventional floor press. A raised torso can change when the upper arms meet the floor.
Check the configurationDo not assume the usual floor-press range limit remains unchanged. Establish the intended stopping point before increasing load.
 ▶ Watch demonstration
Explore chest isolation with a different torso support and starting position.
Set the positionSecure the pad and align the torso with the bench or machine. Check the cable or handle path through an unloaded repetition.
Coach the repetitionUse a controllable elbow bend and a deliberate range. Keep the support position consistent across repetitions.
Check the configurationChanging torso position can change the start angle and available range; do not use the pad to force extra depth.
 ▶ Watch demonstration
Use a contoured torso contact surface within a familiar pressing pattern.
Set the positionCenter the pad on a compatible support and secure it before positioning the head, torso and feet. Recheck rack height or handle reach after adding the pad.
Coach the repetitionKeep the chosen grip, touch point and range repeatable. Start with a load that lets you evaluate the changed setup.
Check the configurationThe raised contact surface changes the athlete’s relationship to the bar or handles. Confirm clearance and a controlled exit before loading.
 ▶ Watch demonstration
Explore chest isolation with a different torso support and starting position.
Set the positionSecure the pad and align the torso with the bench or machine. Check the cable or handle path through an unloaded repetition.
Coach the repetitionUse a controllable elbow bend and a deliberate range. Keep the support position consistent across repetitions.
Check the configurationChanging torso position can change the start angle and available range; do not use the pad to force extra depth.
 ▶ Watch demonstration
Explore chest isolation with a different torso support and starting position.
Set the positionSecure the pad and align the torso with the bench or machine. Check the cable or handle path through an unloaded repetition.
Coach the repetitionUse a controllable elbow bend and a deliberate range. Keep the support position consistent across repetitions.
Check the configurationChanging torso position can change the start angle and available range; do not use the pad to force extra depth. Report the band or assistance setup separately from the bar or dumbbell load.
 ▶ Watch demonstration
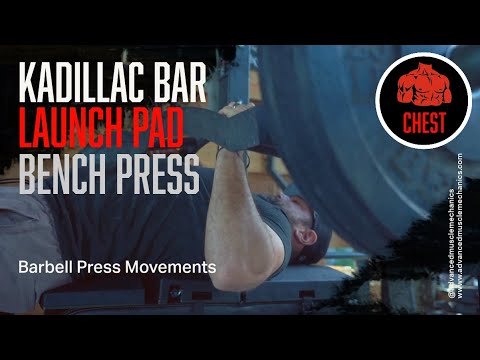
Use a contoured torso contact surface within a familiar pressing pattern.
Set the positionCenter the pad on a compatible support and secure it before positioning the head, torso and feet. Recheck rack height or handle reach after adding the pad.
Coach the repetitionKeep the chosen grip, touch point and range repeatable. Start with a load that lets you evaluate the changed setup.
Check the configurationThe raised contact surface changes the athlete’s relationship to the bar or handles. Confirm clearance and a controlled exit before loading.
 ▶ Watch demonstration
Use a contoured torso contact surface within a familiar pressing pattern.
Set the positionCenter the pad on a compatible support and secure it before positioning the head, torso and feet. Recheck rack height or handle reach after adding the pad.
Coach the repetitionKeep the chosen grip, touch point and range repeatable. Start with a load that lets you evaluate the changed setup.
Check the configurationThe raised contact surface changes the athlete’s relationship to the bar or handles. Confirm clearance and a controlled exit before loading.
 ▶ Watch demonstration
Use a contoured torso contact surface within a familiar pressing pattern.
Set the positionCenter the pad on a compatible support and secure it before positioning the head, torso and feet. Recheck rack height or handle reach after adding the pad.
Coach the repetitionKeep the chosen grip, touch point and range repeatable. Start with a load that lets you evaluate the changed setup.
Check the configurationThe raised contact surface changes the athlete’s relationship to the bar or handles. Confirm clearance and a controlled exit before loading. Report the band or assistance setup separately from the bar or dumbbell load.
 ▶ Watch demonstration
Use a contoured torso contact surface within a familiar pressing pattern.
Set the positionCenter the pad on a compatible support and secure it before positioning the head, torso and feet. Recheck rack height or handle reach after adding the pad.
Coach the repetitionKeep the chosen grip, touch point and range repeatable. Start with a load that lets you evaluate the changed setup.
Check the configurationThe raised contact surface changes the athlete’s relationship to the bar or handles. Confirm clearance and a controlled exit before loading.
 ▶ Watch demonstration
Use a contoured torso contact surface within a familiar pressing pattern.
Set the positionCenter the pad on a compatible support and secure it before positioning the head, torso and feet. Recheck rack height or handle reach after adding the pad.
Coach the repetitionKeep the chosen grip, touch point and range repeatable. Start with a load that lets you evaluate the changed setup.
Check the configurationThe raised contact surface changes the athlete’s relationship to the bar or handles. Confirm clearance and a controlled exit before loading.
 ▶ Watch demonstration
Use a contoured torso contact surface within a familiar pressing pattern.
Set the positionCenter the pad on a compatible support and secure it before positioning the head, torso and feet. Recheck rack height or handle reach after adding the pad.
Coach the repetitionKeep the chosen grip, touch point and range repeatable. Start with a load that lets you evaluate the changed setup.
Check the configurationThe raised contact surface changes the athlete’s relationship to the bar or handles. Confirm clearance and a controlled exit before loading.
 ▶ Watch demonstration
Use a contoured torso contact surface within a familiar pressing pattern.
Set the positionCenter the pad on a compatible support and secure it before positioning the head, torso and feet. Recheck rack height or handle reach after adding the pad.
Coach the repetitionKeep the chosen grip, touch point and range repeatable. Start with a load that lets you evaluate the changed setup.
Check the configurationOffset loading adds an asymmetrical demand. Use experienced supervision, reliable spotters and a carefully controlled setup; this is an advanced variation.
 ▶ Watch demonstration
Use a contoured torso contact surface within a familiar pressing pattern.
Set the positionCenter the pad on a compatible support and secure it before positioning the head, torso and feet. Recheck rack height or handle reach after adding the pad.
Coach the repetitionKeep the chosen grip, touch point and range repeatable. Start with a load that lets you evaluate the changed setup.
Check the configurationThe raised contact surface changes the athlete’s relationship to the bar or handles. Confirm clearance and a controlled exit before loading.
 ▶ Watch demonstration
Use a contoured torso contact surface within a familiar pressing pattern.
Set the positionCenter the pad on a compatible support and secure it before positioning the head, torso and feet. Recheck rack height or handle reach after adding the pad.
Coach the repetitionKeep the chosen grip, touch point and range repeatable. Start with a load that lets you evaluate the changed setup.
Check the configurationThe raised contact surface changes the athlete’s relationship to the bar or handles. Confirm clearance and a controlled exit before loading.
 ▶ Watch demonstration
Use a contoured torso contact surface within a familiar pressing pattern.
Set the positionCenter the pad on a compatible support and secure it before positioning the head, torso and feet. Recheck rack height or handle reach after adding the pad.
Coach the repetitionKeep the chosen grip, touch point and range repeatable. Start with a load that lets you evaluate the changed setup.
Check the configurationThe raised contact surface changes the athlete’s relationship to the bar or handles. Confirm clearance and a controlled exit before loading. Report the band or assistance setup separately from the bar or dumbbell load.
 ▶ Watch demonstration
Use a contoured torso contact surface within a familiar pressing pattern.
Set the positionCenter the pad on a compatible support and secure it before positioning the head, torso and feet. Recheck rack height or handle reach after adding the pad.
Coach the repetitionKeep the chosen grip, touch point and range repeatable. Start with a load that lets you evaluate the changed setup.
Check the configurationThe raised contact surface changes the athlete’s relationship to the bar or handles. Confirm clearance and a controlled exit before loading.
 ▶ Watch demonstration
Use a contoured torso contact surface within a familiar pressing pattern.
Set the positionCenter the pad on a compatible support and secure it before positioning the head, torso and feet. Recheck rack height or handle reach after adding the pad.
Coach the repetitionKeep the chosen grip, touch point and range repeatable. Start with a load that lets you evaluate the changed setup.
Check the configurationThe raised contact surface changes the athlete’s relationship to the bar or handles. Confirm clearance and a controlled exit before loading. Report the band or assistance setup separately from the bar or dumbbell load.
 ▶ Watch demonstration
Use a contoured torso contact surface within a familiar pressing pattern.
Set the positionCenter the pad on a compatible support and secure it before positioning the head, torso and feet. Recheck rack height or handle reach after adding the pad.
Coach the repetitionKeep the chosen grip, touch point and range repeatable. Start with a load that lets you evaluate the changed setup.
Check the configurationThe raised contact surface changes the athlete’s relationship to the bar or handles. Confirm clearance and a controlled exit before loading.
 ▶ Watch demonstration
Use a contoured torso contact surface within a familiar pressing pattern.
Set the positionCenter the pad on a compatible support and secure it before positioning the head, torso and feet. Recheck rack height or handle reach after adding the pad.
Coach the repetitionKeep the chosen grip, touch point and range repeatable. Start with a load that lets you evaluate the changed setup.
Check the configurationThe raised contact surface changes the athlete’s relationship to the bar or handles. Confirm clearance and a controlled exit before loading. Report the band or assistance setup separately from the bar or dumbbell load.
 ▶ Watch demonstration
Explore chest isolation with a different torso support and starting position.
Set the positionSecure the pad and align the torso with the bench or machine. Check the cable or handle path through an unloaded repetition.
Coach the repetitionUse a controllable elbow bend and a deliberate range. Keep the support position consistent across repetitions.
Check the configurationChanging torso position can change the start angle and available range; do not use the pad to force extra depth.
 ▶ Watch demonstration
Explore chest isolation with a different torso support and starting position.
Set the positionSecure the pad and align the torso with the bench or machine. Check the cable or handle path through an unloaded repetition.
Coach the repetitionUse a controllable elbow bend and a deliberate range. Keep the support position consistent across repetitions.
Check the configurationChanging torso position can change the start angle and available range; do not use the pad to force extra depth.
 ▶ Watch demonstration
Use a contoured torso contact surface within a familiar pressing pattern.
Set the positionCenter the pad on a compatible support and secure it before positioning the head, torso and feet. Recheck rack height or handle reach after adding the pad.
Coach the repetitionKeep the chosen grip, touch point and range repeatable. Start with a load that lets you evaluate the changed setup.
Check the configurationThe raised contact surface changes the athlete’s relationship to the bar or handles. Confirm clearance and a controlled exit before loading.
 ▶ Watch demonstration
Explore chest isolation with a different torso support and starting position.
Set the positionSecure the pad and align the torso with the bench or machine. Check the cable or handle path through an unloaded repetition.
Coach the repetitionUse a controllable elbow bend and a deliberate range. Keep the support position consistent across repetitions.
Check the configurationChanging torso position can change the start angle and available range; do not use the pad to force extra depth.
Try a broader muscle group, equipment choice or search term.
05 · Fit the session
Name the movement and the reason for changing the support.
Record the contact, equipment settings and intended range.
Use an effort and volume appropriate to the current program.
Evaluate control and performance before changing another variable.
06 · Bench research
4-week study
Bars show reported mean changes from zero on the same 0–25 kg scale. Standard deviations are reported here, not drawn as error bars: flat bench 11.1 ± 2.4 kg; Launch Pad 18.4 ± 4.3 kg.
8-week study
Bars show reported mean changes from zero on the same 0–25 kg scale. Standard deviations are reported here, not drawn as error bars: flat bench 9.7 ± 3.4 kg; Launch Pad 19.4 ± 4.3 kg.
Continue exploring
Advanced Muscle Mechanics®
Explore the product, understand the setup and choose the applications that belong in your training.